Thursday, August 26, 2010

My Creative Scrapbook Main Kit August

JOURNEY

This is another page I am doing for Ben's PhD graduation album. This is the 3rd graduation album I have made for him. The first was for his high school graduation and the 2nd for his Bachelors degree. He had two additional graduations, one from our local community college with an associates degree, and one from Missouri State with his Masters degree. He has been on quite the educational journey that began with that masked hero venturing out on his first day of kindergarten.

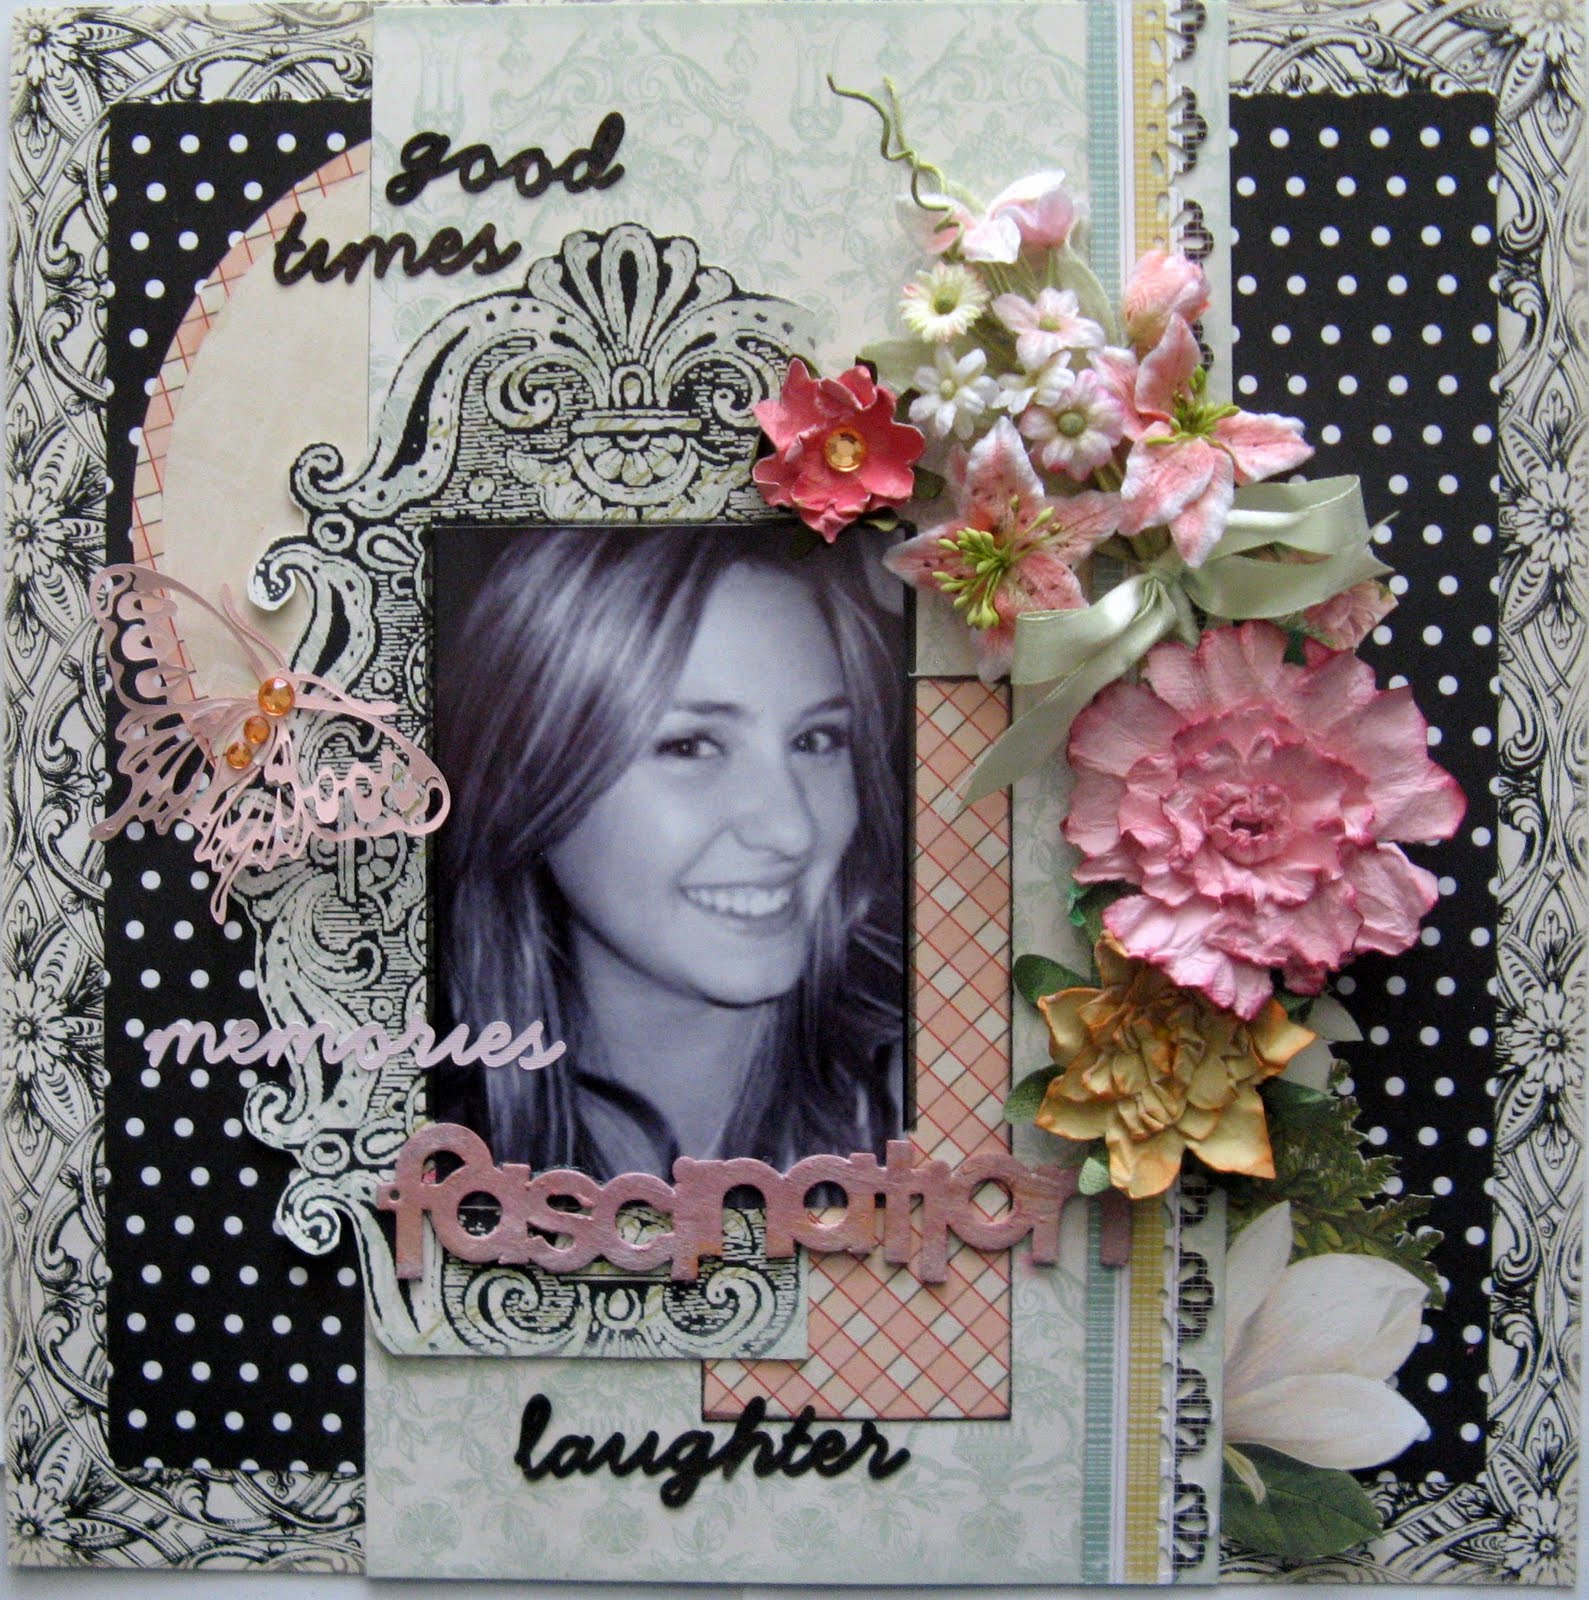
This is my first page with my August main kit from My Creative Scrapbook. Although I am delighted to have been invited to guest design for the remainder of the year, this months work is not design team work.

I have provided a tutorial for the crepe paper flowers both here and at the MCS website. The leaves are Silhouette cuts. The "rope" both strung and circled, is twisted strips of crepe paper.

ROAD TRIP


This is my youngest son, Matt, and me on the road trip we took a couple of year ago to Denver to join Ben, my 2nd son, who came from Lawrence KS to meet us and attend the concert of one of our favorite bands, Wilco.

This is my 2nd page using the Aug. main kit from My Creative Scrapbook. I once again added the crepe paper flowers and cut the leaves with my Silhouette, also inking and adding Stickles.


Thursday, August 19, 2010

Baby Birds


CT work for Gone Scrapbooking at Examiner.com.

Scrapbook inspiration from Jackie Anderson

"These two adorable baby birds are my three-year-old grandson, Gary, and nine-year-old granddaughter, Ceairrah, nesting in the apple tree in my back yard. I pulled babysitting duty last weekend and it is always a great photo-op."

Product list:
BoBunny
- Chunky Charms swirls and brackets

Maya Road
- Chipboard alphabets

Moxie
- Baby Mine collection patterned papers

Prima
- E-line flowers, pink
- Fiesta flowers, Cortez

Tattered Angels
- Glimmer Mist, Vintage Pink


Monday, August 9, 2010

Scrapbook inspiration from Jackie Anderson

Creative team work for "Gone Scrapbooking" at Examiner.com. Please follow this link for more information: Scrapbook inspiration from Jackie Anderson


Friday, August 6, 2010

Fascination

I'm still working on my Webster's Pages, clearing out the old and getting ready for the new! This is pretty Paige, my niece. I also used Maya Road chipboard for the title, which is both inked and Glimmer Misted. The words and butterfly are Silhouette cuts. The flower vine is Prima and the other flowers are my own creation, tutorial provided under the heading "Chrysanthemum tutorial" if anyone is interested.


water distressed bloom tutorial


These Chrysanthemums are a variation of all the pretty flowers I have seen other artists create using water. For these I used my Quickutz Silhouette and the jagged edges "nesting flower" file. The pink flower on my layout is done with plain pink Bazzil cardstock. The variegated flower shown along side it in the photo above is the one I use in my step-by step instructions.
I began by creating my own patterned paper with Tattered Angels screens, shades of pink and red Glimmer Mist and a sheet of plain white card stock. It's pretty wild looking and not something I would ever use except to make these flowers.


STEP 1
CUT, PUNCH or TEAR YOUR CIRCLES

I waited for my sheet of patterned paper to completely dry before running it through my Silhouette. I learned that impatience doesn't pay if you try to cut it too soon. Even if it is just barely damp, the blade will just chew it up. This flower could easily be made by tearing your circles if you don't have a cutting machine.

For the fuller flowers I used all 8 sizes and layers from the nesting flower. For the flatter flowers I only used 4. I love the way you can vary the look of your flower just by changing the number of layers.

STEP 2
DAMPEN CIRCLES

I had a nearly empty bottle of cream colored Glimmer Mist that I filled with water to spray my paper and it delivers just the right mist with the added benefit of a little left over glimmer. You don't want to get the paper too wet or it tears and takes forever to dry.


STEP 3
BALL UP THE CIRCLES


STEP 4
GENTLY UNFOLD THE PAPER BALLS
I also like to tear 5 petals in the circle for extra ruffles. I took a photo, but it has been raining every day and some of my pictures didn't turn out.

STEP 5
POKE HOLES in the center of each circle and beginning with the smallest, INSERT BRAD and FOLD and squish the circle around the brad until each circle is folded up around the center. Secure the brad.

STEP 6
GENTLY UNFOLD your flower.

STEP 7
When the flower has completely dried, ink the edges and use your ink pad to fluff up the layers.


STEP 8
Attach flower to leaf base. This base is a flower daisy I cut with my Silhouette, dampened and crumpled just as I did the flower circles.


And here are the same flowers except smaller using patterned paper.


You can use this same method
to create a vast assortment of flowers by using different flower patterns, layers, sizes, papers and folding techniques. Here are a few I made today using several different patterns.


These remind me of water lilies and also utilize a nesting flower file from Silhouette.


Roses
These roses are made with a scallop circle. The small ones above are made from the smaller scallops and use 8 of the same size. It makes for a very full flower. The smaller ones below used the larger scalloped circle shown, 2 large, 2 medium and one small. The large pink ones have just 2 circles. I added twine, a Petaloo flower and button to the center of one and left the other with just the brad showing to decorate later depending on the layout.

Sun flowers
These flowers use the flower daisy Silhouette file, which is also the file I used to create the leaf base.

Thursday, August 5, 2010

Using up my Webster's Pages

I just adore Webster's Pages, and now that all their new stuff is coming out, I have pulled out my stash and am using it up to make room! I was also inspired by the July vintage challenge at the Webster's Pages site, which took three layouts before I had one I was willing to enter. I settled on "Dover Grandparents" which I posted last month. I'm still waiting to hear the results. "Vintage Me" and "Grandma's Babysitting Service" are my rejections, but I still like them and hope you do too. I completed the other 2 pages just this week.

MY SWEET BOY

I don't think this page featuring my youngest son Matt when he was just 6-years-old qualifies as vintage even though he is now 24. It was in an old collage picture frame that I recently dismantled and I am so unhappy with myself for smearing ink on his sweet little face, but my efforts to erase it were just making matters worse, so there it is.


VINTAGE ME

I did lots of inking, distressing, hand cutting and some masking with Glimmer Mist on this layout of me as a baby.


GRANDMA'S BABYSITTING SERVICE

I have such fond memories of summer days spent in Cedar City at my Grandma Dover's playing with all my cousins. Mom has two sisters very close in age, so as you can see, I had lots of ready made friends!


BE INVOLVED

This last page is for my sister and features my nieces and nephews "getting involved" in the Kerry campaign back in 2004. It was a good message for kids, even though their candidate lost.


Thanks a bunch for dropping by!

Tuesday, August 3, 2010

TCR #17

MY GIRLS

My sister and niece's snuggled up together in their pj's in my mom and dad's 5th-wheel on one of our annual family camp trips.


Products:
Bazzil Basics: white & brown
American Crafts: Amplified background die cut
Autumn Leaves: patterned paper hand cut elements
Quickutz: Silhouette die cuts - title, bird cage, hearts, heart mask, branch
Prima: flowers


A MOMENT TO CHERISH


Product list:

Autumn Leaves: patterned paper
Bazzil: brown, pink, lavender cardstock
Treehousememories: floral patterned paper
Quickutz: Silhouette die cuts - title, heart, swirl
Prima: flowers
Martha Stewart: border punch
Signo: white gel pen


Thanks so much for taking the time to visit!