 I confess, I'm a photo thief! It's not enough that I have a drawer full of my sister's photos to scrap, or that I carry my camera with me where ever I go and torment my family with photo ops, I also raid their face book photos, which is where I came across this adorable photo of Astrid, my future daughter-in-law. She did not cooperate by including any information on the photo, so I can only guess that it was taken in Kansas where she and my son met at KU, and where they are both grad students. It does look like Kansas don't you think?
I used K&Company's new Susan Winget specialty paper pad, "Nature" for this layout. It had so many gorgeous sticker sheets to match, and you know I had to get them! The flowers are Prima, Innocence and Belle Arte Mystere. I made the swirl using a technique I learned from Lynn, also know as foamy at scrapbook.com, using Zva swirls as a pattern and pearlized white fabric glue.
I am often asked how I do my distressed edges, so will address that technique with this layout. There are several different ways to begin. This is one I developed by examining the pages of one of my favorite scrapbookers, gabriellep. I begin by free-hand cutting a wavy edge all around my paper. I have also used various deco edge scissors for a different look, or just skipped this first step and begun at step two.
 The second step is to distress the edges. I like to use this simple Heidi Swapp edge distresser, which was a gift from my sweet friend Bettylou and one of my most used tools. You just run it along the edge of your paper. You can also use your scissors to accomplish the same look as demonstrated in the next photo, though it requires a bit more practice and skill.
 The next step is to ink the edges as heavily or lightly as you like with whatever color suits your fancy.
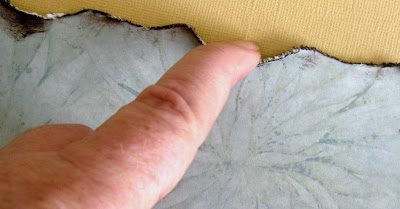
  You can see by my finger that I have been doing some inking today! I suppose the last 2 steps are interchangeable and that my fingers wouldn't always be ink stained if I were to reverse the order, but I have always inked and then used my fingers on the inside curve to roll the paper back.
  And this is what it looks like when you are all done!
 Thanks again for stopping by.
4 comments:
What a pretty and sweet design,love the layering!
Oh wow Jackie.... another gorgeous page. Love the big pearl swirl.... beautiful!
Gorgeous page and thanks so very much for the "how-to"; I've been wondering how to get that effect!!!!
Beautiful!!! I love it!!! Thanks for the tips!!!!
Post a Comment